On my right is one of my looms with two scarves part
way finished. Also my guitar, and my bag of knitting, and some sewing, and some
mending, and some material to consider when writing…
Almost in front of me is more knitting and spinning...
In front of me is my computer and I should be writing
(novels or a libretto or something, but I’m doing this blog…).
Across the room high on a bookshelf is more knitting
(a pair of socks I started oh maybe four years ago…), and some calligraphy that
I want to do. And my recorders reside
there too.
On the table (the one I am supposed to eat at) is a
miniature project, a maxi project, music… and crowded round my table (same one)
is my harp and lute (the latter is on a chair – but protected from being “sat”
on), while two other chairs are occupied with “gardening projects”, and two
more sewing projects.
My bedroom houses my large loom which is still partly
warped – meaning I haven’t finished putting the warp through the heddles and…
that project has been waiting for almost 18 months).
My closets are packed with wool (some silk, cotton and
linen too) WAITING to be spun, And a few more sewing projects are also lurking
in the closets.
My two spinning wheels are hiding on my left,
horrified that I haven’t been spinning in – far too long.
Last week I finished sewing a dress, and the week
before a skirt. This week my sewing is a top, a shoe (the second of two - first visible on my table, above), and a
“book cover” (which is cut out and ready to be sewn - also on my table).

dress
This week I began a new knitting project – only
because I wanted to understand the directions! I think I have them working to
MY satisfaction though not precisely “as written”. I also began another
“mini-book” like I did for my Illuminated
Manuscripts of Medieval Europe course, which I took last winter. I’ve got a couple of projects like that either planned or “in
progress”. One is my “maxi project”. It is to reproduce several pages of choral
music in four acapella voices such as were used by church choirs in the Middle
Ages. Another is a romanticized biography of my Society for Creative Anachronism persona Yrmegard. The latter is NOT to be confused with my novel by the
same name.
My “mini” project is taking up most of my table and
part of my kitchen. Sounds pretty big to be a mini project! I’ve been following
a few YouTube channels on miniatures such as those used for fantasy role
playing games or model railroads. Some of those are amazing. But I would like
to be more authentic. So I began with making a wattle wall. My plan was to make
a miniature three sided “booth” such as a merchant might use, and to lean about
wattle and daub (haven’t gotten to the daub yet… haven’t finished with the
wattle!). Anyhow the more I did the more I learned. Lesson #1: it helps to have
a firm base. Lesson #2: use the finest (thinnest) twigs for miniature wattle
fill, because it is what holds the daub in place. Lesson #3: I’d better build a
proper frame to hold my projects in if I am going to extend this experiment!
Lesson #4: it is a good thing I didn’t use Styrofoam as a base for my mini
project – the stresses of the wattling process would have destroyed the foam!
Concrete “might” work, but probably best will be holes drilled into a sturdy
board (a 4 x 4 or its equivalent). Now
the table has various sized sticks and twigs, and there are two potential types
of “roofing” material drying (grass for a proper thatched roof, and something
else which can pass as wooden shingles). I know I know. One can do mimis the
easy way, pre-made plastic forms, or cut your own imaginative forms from foam,
but REALLY!!! Why not try doing it the old-fashioned way (ok, yeah they made
things full-sized. But what if I ever actually HAD to make a home using the
“real stuff”… which will be better preparation? Yeah, the tedious hard real
way!) some of my mini project
 some of my mini project
A different mini project:
 preparing paper for a mini book, staining one side of the paper with a diluted coffee vinegar mix to resemble real parchment (sort of, but not really).
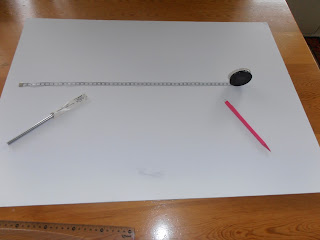
 after the paper is stained and dry, I cut off the "ends" and then do the mise en page... on the right is a MAXI project. Below the pricking and lining a text has been writen, and below that I am experimenting with capitals and initial letters before adding them to my mini book.
 |
| Maxi Project: Measure and divide in half |
and below the successful division. These will form the covers of my maxi book


